When it comes to caping a deer for taxidermy, knowing the right techniques is vital. You’ll need the right tools and a proper approach to guarantee the skin remains intact and in good condition. Positioning the deer correctly is the first step, setting the stage for a successful process. But what are the essential tools and techniques you’ll need to master? Let’s explore the details that can make all the difference.
How to cape a deer for taxidermy: What do you need?
To successfully cape a deer for taxidermy, you’ll need several essential tools and materials. First, grab a sharp knife for precise cuts. A sturdy pair of scissors will help with skinning, while a fleshing knife is important for removing excess tissue.
You’ll want a sturdy work surface to keep everything organized. Don’t forget gloves to maintain hygiene and avoid contamination. A game bag will protect the cape during transport, and salt is critical for preserving the hide.
Finally, have a cooler ready to keep the cape fresh until you’re ready to begin the taxidermy process. Happy caping!
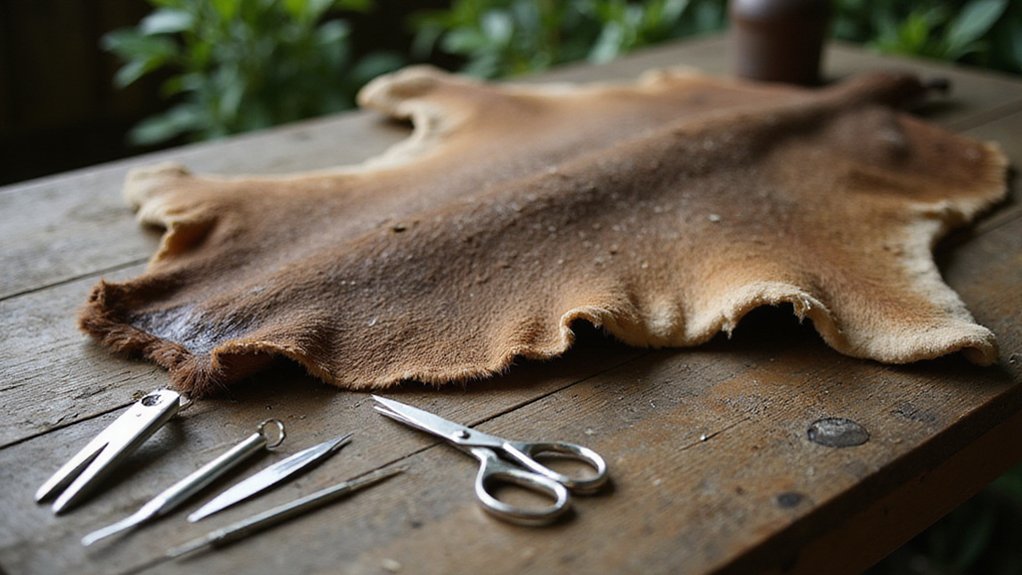
What are the essential tools for caping a deer?
When you’re getting ready to cape a deer, having the right tools on hand is vital for a successful process.
You’ll need a sharp knife for precise cuts, a pair of scissors for trimming, and a bone saw for removing the skull cap if you’re planning to preserve the head.
Don’t forget a pair of gloves to keep things clean and a game bag to store the cape. A sturdy work surface makes the job easier, too.
Finally, having a measuring tape handy helps guarantee you get the right size for your taxidermy project.
Be prepared, and you’ll succeed!
How to properly position the deer before caping?
Positioning the deer correctly before caping is essential for a smooth process. Start by placing the deer on its back, ensuring it’s stable and secure. You can use a deer cart or a flat surface to prevent any rolling.
Make sure the head is facing you, which gives easy access to the neck and shoulders. If possible, elevate the body slightly to improve visibility and comfort during the procedure.
Check that the legs are straight and that you have ample room around the deer to maneuver. This setup will help you work efficiently and effectively throughout the caping process.
What is the step-by-step process for caping a deer?
With the deer securely positioned on its back and ready for caping, you can now begin the step-by-step process.
First, make a shallow incision around the legs, then carefully cut along the belly from the sternum to the base of the tail.
Next, use your knife to separate the skin from the meat, working your way around the shoulders and neck. Be sure to avoid cutting through the hide.
Once you reach the head, cut around the eyes and ears, and then detach the skin from the skull.
Finally, carefully remove the cape, ensuring it remains intact for taxidermy.
Why is it important to preserve the skin correctly?
Preserving the skin correctly is essential for guaranteeing the longevity and quality of your taxidermy mount.
If you don’t handle the skin properly, you could face several issues that might ruin your hard work.
- It prevents bacteria and odor from developing.
- It maintains the skin’s natural color and texture.
- It avoids damage and deterioration during the tanning process.
- It secures a strong bond between the skin and the mount.
Taking the time to preserve the skin right from the start will pay off in the end, resulting in a beautiful, lasting display of your trophy.
How to avoid common mistakes while caping a deer?
While caping a deer, you can avoid common mistakes by staying focused and following a systematic approach.
First, make certain you have all your tools ready, including a sharp knife and gloves.
Pay attention to your cuts; aim for smooth, even lines to prevent damaging the hide. Don’t rush—taking your time helps guarantee precision.
Be careful around the ears and eyes, as these areas are delicate. Always keep the skin as clean as possible and monitor for any signs of hair slip.
Finally, double-check your work before moving on, confirming you haven’t left any flesh or fat behind.
What should you do after caping a deer for taxidermy?
Once you’ve successfully caped the deer, your next steps are essential for preserving the hide and ensuring it’s ready for taxidermy.
Start by carefully removing any excess flesh and fat from the hide. Then, rinse it with cold water to remove blood and debris.
Following that, apply a generous amount of salt to the skin side to help in drying and preserving.
Finally, wrap the cape in plastic and refrigerate or freeze it until you’re ready to take it to your taxidermist.
- Remove excess flesh and fat
- Rinse with cold water
- Apply salt generously
- Wrap and refrigerate or freeze
How to select a taxidermist for your deer cape?
After preparing your deer cape, the next step is finding the right taxidermist to bring your trophy to life.
Start by researching local taxidermists and checking their reviews. Look for someone with experience in deer mounts and a strong portfolio showcasing their work.
Don’t hesitate to ask for references from previous clients. Schedule a consultation to discuss your options, and pay attention to their communication skills and professionalism.
Confirm they’re knowledgeable about the process and can answer your questions. Finally, compare prices but remember, quality craftsmanship is worth the investment for a lifelike mount you’ll cherish for years.